Description of Script
Our script has to be added to your web properties for UCP to be available.
Once a notice is configured, this script is available in our privacy application, https://privacy.evidon.com/.
Here is an example:
Our script is intentionally generic and is meant to be hosted on your various web properties. The only customer-specific piece of information is the identifier assigned to your company in our system. That is inserted into the section just above the closing script tag titled {your company identifier}.
|
When you download the script from the privacy application, you’ll see the identifier included by default. |
When this script runs on your web properties it will do the following:
- Load the evidon-sitenotice-tag.js script, which is what powers our UCP.
- Load the country.js script which tells our script which country it is currently active in.
- Load your company themes script - snthemes.js. This contains the styles for the user interface elements we display.
- Load the settings.js file, which contains the settings used to correctly display our UCP based on the location, user language, and current domain.
In addition to the script loading, we have the shell of our prior consent callback function - window.evidon.priorConsentCallback - with some comments on how to use it. If you aren’t using prior consent anywhere this script will execute, or if you are using one of our tag manager integrations to control prior consent, you can safely remove that section of the script.
In the script you will see a function called getRootDomain. That function is used to pull the root domain from the current URL -- for example “www.evidon.com" would return “evidon”. That is used to pull the correct settings file to power the notice. You can safely run our script on web properties where you are not using our UCP, but that will involve each page pulling down the resources listed above. If a settings file is not located the call will log a 404 error which will be visible in browser consoles. Beyond that it won’t hurt anything, there will just be some extraneous resource calls made.
Script Deployment
Deploying our script should be very straight-forward. Just take the supplied script and add it to the templates used in your web properties. It can either be placed in the header or body. There is no specific location required for our script to function.
If you are using one of our supported Tag Manager integrations, you can also deploy our script using your tag manager. There are instructions for GTM and Tealium later in this document. For additional assistance, ask your Customer Success Manager (CSM).
Creating Notices
In addition to deploying our script to your web properties you will also need to set up one or more domains in our privacy application, so our script knows it is supposed to execute on those domains. The full scope of creating notices is beyond this document, but it is important to understand how to configure the various domains and what effect that will have on the UCP when it runs on your properties.
As a short introduction, when you set up your notice for prior consent, your site users see a banner that must be accepted before non-essential tracking is triggered.
To enable prior consent, you’ll create or edit a site notice for a domain by following the steps in this guide.
In step 3 of the wizard, you will:
- Select Banner Notification as the Notice Type (so users can navigate the site with or without consent)
- Check Consent Required
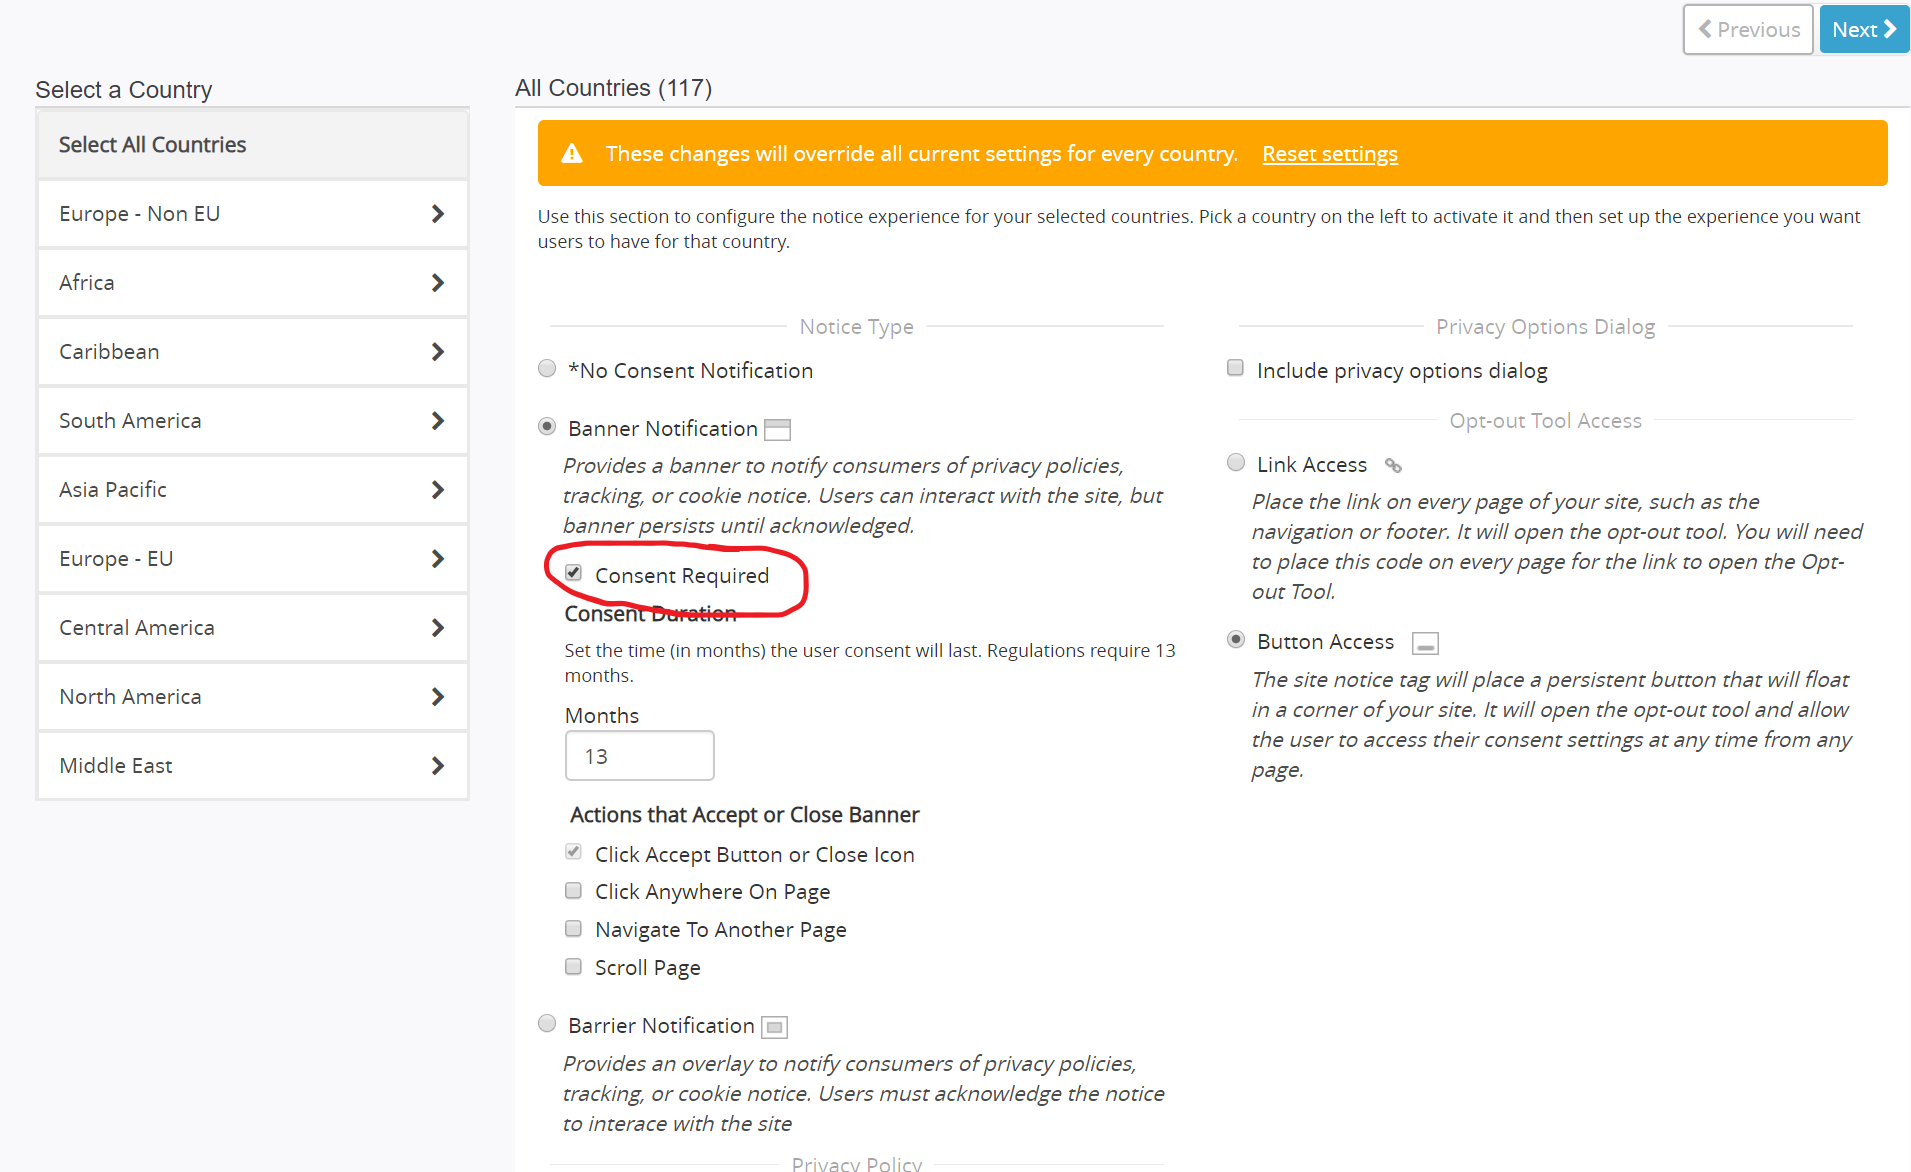
On your site, your users see a banner with an accept button. They will be able to navigate the site, but the banner will persist until it is accepted.
The first thing to understand is how our script detects the current domain to map that to the specific notice for that domain. The script pulls the current location from the browser and uses that domain/path information to search the list of domains in the settings.js file pulled for that domain. It scans the settings.js list of domains by length, starting with the longest one to find the correct match. The comparison is a simple, case-insensitive match.
The second thing to understand is what the domain means in terms of the UCP. The domain value can technically be a domain, a subdomain, or simply a “host” that resolves to a specific website. Paths may be included as well. Each domain is a singled notice setup that can contain a variable set of experiences for a user based on their location viewing your site and their language requested. Domains are used to map user experiences to a specific set of advertising/analytics vendors. When setting up your domain, it is important to segment your properties out in a manner that encompasses those vendors. It is better to over-disclose than under-disclose. When your website is scanned, the vendor under that domain will be added. This scanning and grouping are done on a per-country basis, so keep that in mind when assigning countries to your notice. If you select multiple regions or multiple countries, you may be creating multiple scans per domain notice setup. If you have questions to determine exactly what you need or how this affects your setup, contact your CMS or TAM.
Keeping those two things in mind, the UCP is very flexible on how you add Domains. You can set up specific sub-domains (e.g., “product.mycompany.com”, “stuff.mycompany.com”, “www.mycompany.com”, etc.), specific paths (“www.mycompany.com/product”, “www.mycompany.com/stuff”, etc.), or a root domain (”mycompany.com“). When you set up a root domain that will act as a fallback for all sub-domains not setup with their own notice setup. For example, if you set up “mycompany.com” as a domain and do not have a notice configured for “product.mycompany.com”, a site user will see the notice configured for ”mycompany.com”.
|
One caveat on using just a root domain (“mycompany.com”). If you are set up for vendor auto-population (“auto-pop”) our scanning system use the Domain entered for the notice as the starting point for their crawl and scan actions. Because of that they will not scan sub-domains since the scanner system does not know about them. In this instance, the scanners may miss vendors specific to sub-domains if you have sub-domains using a different set of vendors. If that’s the case it would be better to set up a separate notice for that sub-domain. |