Configuration
The Projects & Sites feature is first configured by submitting a support request. Request that these two flags are enabled:
- Projects & Sites
- Project Branching
Once these features have been activated, group permissions must be set up for your users to enable creation of Projects & Sites.
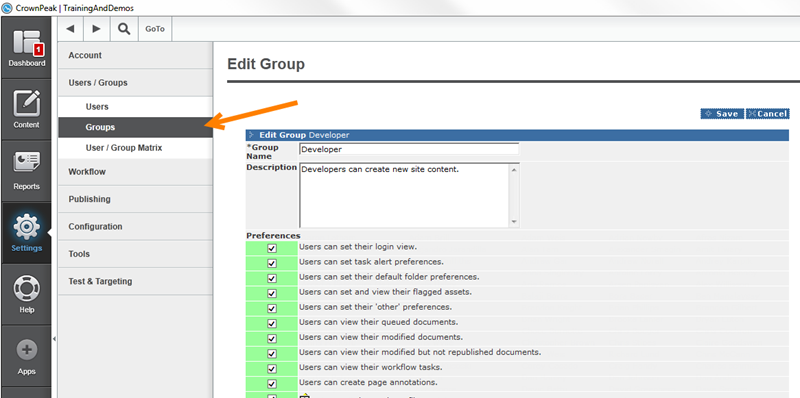
Specifically, select the following for the groups you want to enable.
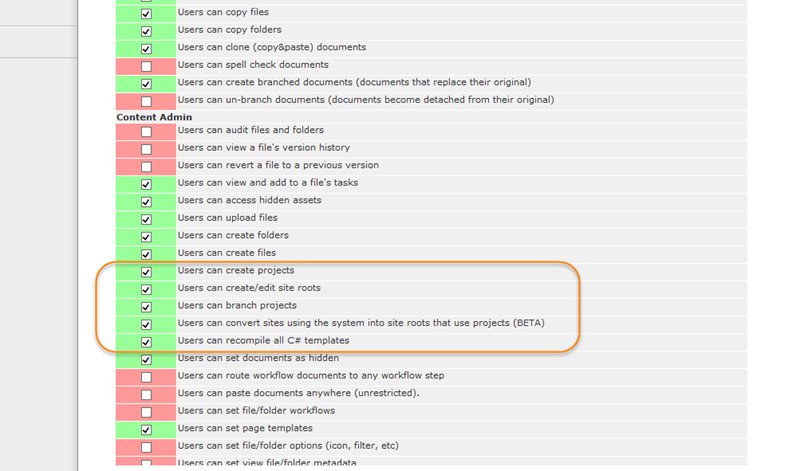
- Users can create projects
- Users can create/edit site roots
- Users can branch projects
- Users can convert sites using the system into site roots that use projects (BETA)
- Users can recompile all C# templates.
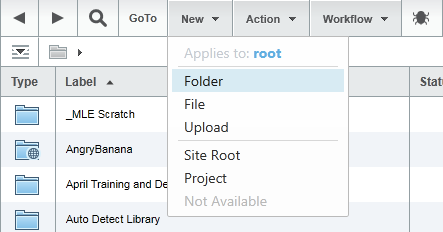
Once these configuration steps are completed the Site Root and Projects options will be lit up in the New menu.
 > 2016-03-17_22-19-55.png")
Not Configured
 > 2016-03-17_22-24-55.png")
Configured
Creating and Using Projects
Let’s walk through the steps to create both nested and shared projects
- Create a folder for your family of sites. This is not required, but is a best practice recommendation to organize instances.
- Create a Site Root.
A few notes --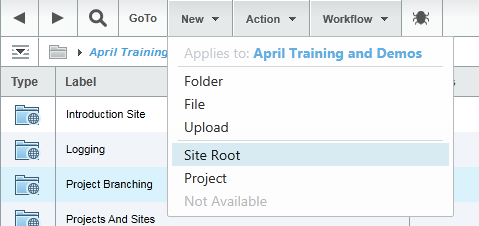
- It’s properties connect the content to projects and project branches
- API allows you to programmatically locate Site Root (to use for site configuration, for example):
- Create your Projects
- Create one project as a sibling of the Site Root so it can be used by more than one site. Call it SharedProject. Add a name for the library - SharedLibrary
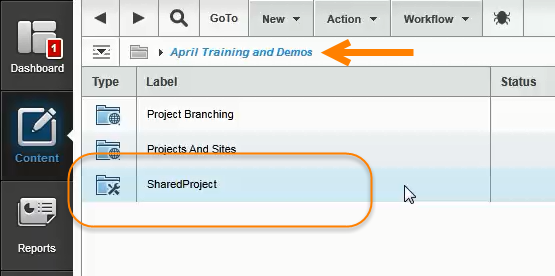
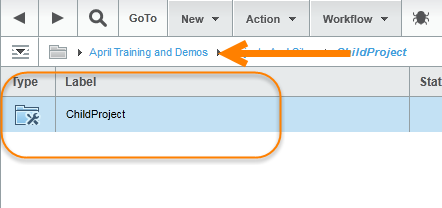
- Create another project as a child, in the Site Root folder. It will only be used by that site. Call this project and library ChildProject, ChildLibrary respectively.
- An optional API is available to programmatically create projects.
- Create one project as a sibling of the Site Root so it can be used by more than one site. Call it SharedProject. Add a name for the library - SharedLibrary
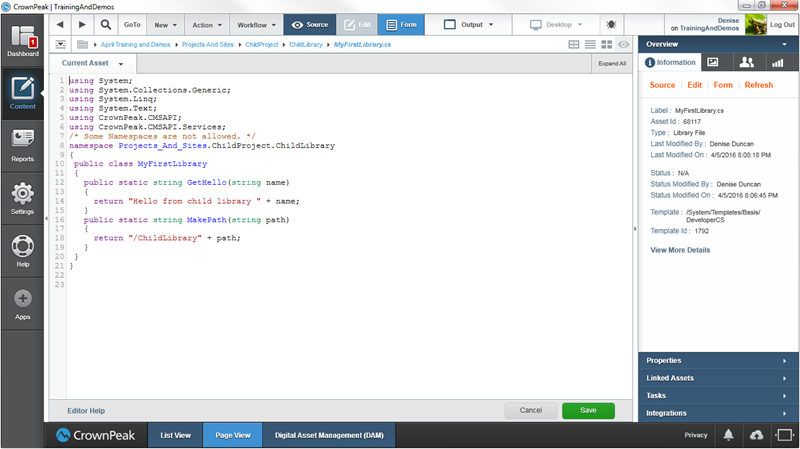
- Open ChildProject
- Go to ChildLibrary and select the New menu
- Select Custom C# Class and create MyFirstLibrary.cs
- Add this code sample. You will use this to demonstrate how libraries are shared between projects.
{
public class MyFirstLibrary
{
public static string GetHello(string name)
{
return "Hello from child library " + name;
}
public static string MakePath(string path)
{
return "/ChildLibrary" + path;
}
}
}
You have now created a Site Root and 2 projects. You have created a library class file in your child project. You'll come back to the shared project after you create a developer file and a template.
Filenames
Use the Filenames folder for uploaded assets and developer templated files in the Site Root to mange their filenames and urls with template API code.
- In the ChildProject/Filenames directory, select New > filename.aspx to create a template file that will manage filenaming for all assets using the Developer Template. This will also manage naming for uploaded assets.
- Add this code sample to name files using a method you just created in your library.
<%
// filename.aspx: template file to allow filename to be set via code
// ex. code to use the cms id along with the folder names for the asset filename
context.PublishPath = MyFirstLibrary.MakePath(context.PublishPath);
%>
Templates
All templates for your site live here. Create template and test file using the steps below.
- In ChildProject/Templates, select New > Template and call it MyFirstTemplate.
- Edit output.aspx and add this sample code. This prints content using a method from your child project.
- Go back to your site root folder, select New > File and and call it Testpage.
- Select the template you just created and the Basic Workflow to configure the page
- Preview to see the rendered output.
<h1>My First Page</h1>
<p><%= MyFirstLibrary.GetHello("Fred") %> </p>
Library References
Use external libraries by adding library references.
- Go back to SharedLibrary
- Create and edit a library file called MySecondLibrary.cs. Add this code sample to create a new class.
{
public class MySecondLibrary
{
public static string GetHello(string name)
{
return "Hello from Shared Library, " + name;
}
}
}
- Return to ChildProject. You can use the GoTo menu to easily jump back.
- Select New > Library Reference. Give it a unique name and create the reference to SharedLibrary.
- Also create a reference to the default folder custom library - /System/Library.
Now use the references you just created.
Using External Libraries
- Return to your Site Root
- Select New > File and choose the C# Developer Template option. Note namespace references to ChildLibrary and the other libraries referenced in this project.
- Add this code sample to call both methods
- Preview to see output rendered from methods from both libraries
<h1>Using Two Libraries</h1>
<p>First: <%= MyFirstLibrary.GetHello("Foo") %></p>
<p>Second: <%= MySecondLibrary.GetHello("Bar") %></p>
Properties and options
- Best practice is to set the publishing properties on the site root. The settings will be inherited by the pages and folders.
- Take a look at the publishing properties for the file you just created. ChildLibrary is added to the path because ChildProject/Filenames/filenames.aspx is being used to manage naming.
- Site root properties screen
- Use this screen to edit the current project. This changes the default for template, model and library selections.
- You are also able to associate project branches with publishing states. More information on project branching is available here.
- Recompile options
- Use this to recompile the templates and libraries for just this project
- Use this to recompile the templates and libraries for just this project
Summary of Project related APIs
Here is a list of the new and changed APIs that are related to the new project functionality. All methods are in the Asset class
- public static Asset CreateNewSiteRoot(string label, Asset saveLocation);
- public static Asset CreateProject(string label, string libraryName, Asset saveLocation);
- public static Asset CreateLibrary(string label, Asset project)
- public static Asset CreateLibraryReference(string label, Asset project, int externalLibraryId);
- public static Asset CreateTemplateFolder(string label, Asset parent);
- public static Asset CreateTemplate(string label, Asset parent);
- public static Asset CreateTemplateFile(string label, Asset parent);
- public static Asset CreateCSharpDeveloperTemplate(string label, Asset parent);
- public static Asset GetProject(Asset asset);
- public static Asset GetSiteRoot(Asset asset);
- public static Asset GetSiteRootProperties(Int32);
- public bool SetAsSiteRoot(bool doSetAsSiteRoot = true);
- public static bool RecompileLibrary(int libraryId);
- public FolderType GetFolderType();
- public enum FolderType
New Optional Parameter for GetFilterList, GetFolderList, GetFileList (Default to true)
public List<Asset> GetFileList(AssetParams assetParams);
public List<Asset> GetFileList(SortOrder sortOrder = null, int? limit = null, List<string> fieldNames = null, List<string> excludes = null, List<string>
filterStatus = null, List<string> excludeFilterStatus = null, bool excludeProjectTypes = true);
public List<Asset> GetFilterList(FilterParams filterParams);
public List<Asset> GetFolderList(AssetParams assetParams);
public List<Asset> GetFolderList(SortOrder sortOrder = null, int? limit = null, List<string> fieldNames = null, List<string> excludes = null, List<string>
filterStatus = null, List<string> excludeFilterStatus = null, bool excludeProjectTypes = true);