Overview
Project Branching is a powerful feature that allows developers to branch their code at the Project level. A project branch is simply a copy of the original project. Once the branch is created, you can edit the branched templates or library code. These changes are independent from the original branch. Note: At this time, only code that is in a Project can be branched.
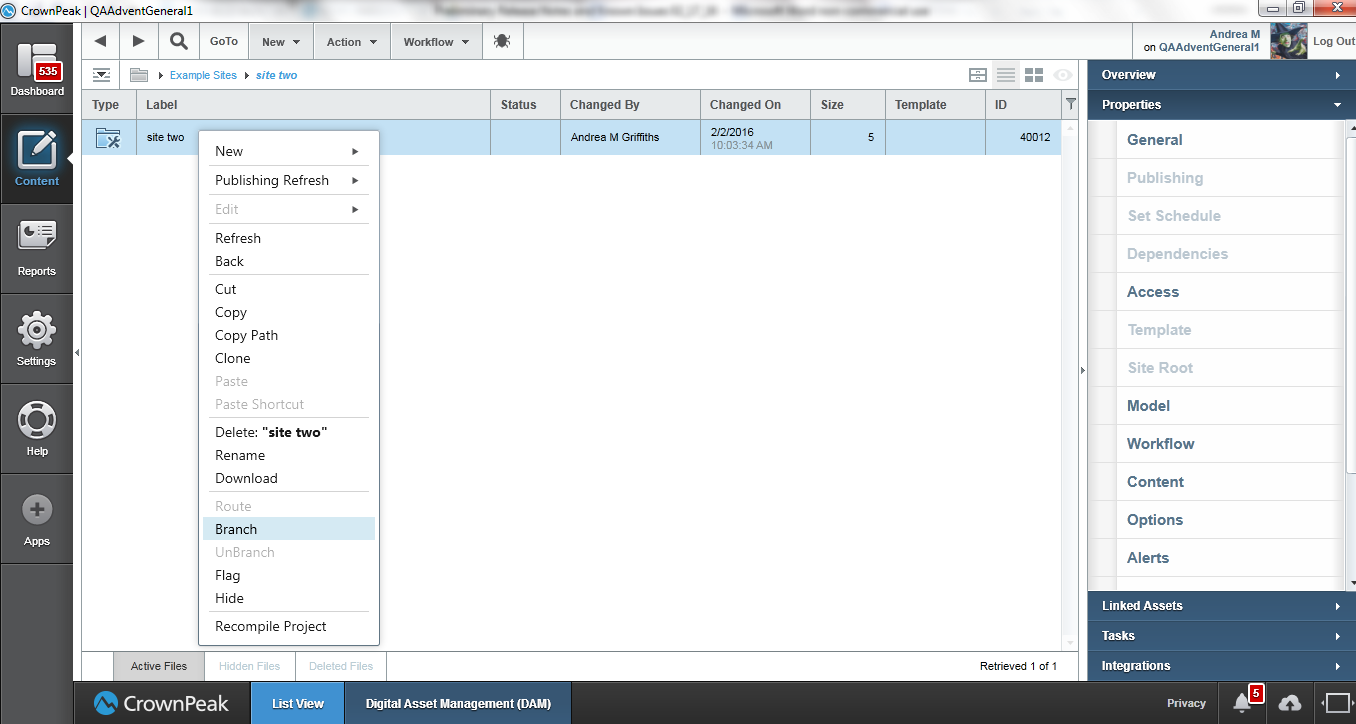 Figure 1 - Project Branch
The CrownPeak CMS allows developers to branch their code. This will be done at the Project level. Sites are for content, while Projects are for code and configuration. At this time, only code that is in a Project can be branched. A project can be created by selecting [Project] from the [New] menu. To create and use projects, you must have projects enabled on your instance. It is recommended that you create your project inside a Site Root if the project is going to be exclusively used by that site. Make the project a sibling of your site root if you want it to be shared by other sites that are also siblings of that site root.
To create a Site Root select [Site Root] from the [New] menu. You can also select [Action] -> [Convert Folder to Site Root] to make an existing folder into a Site root. You need to have a site root to fully utilize the project and its branches.
To branch a project simply select the project and choose [Branch] from the [Action] menu. You must have code branching enabled on your instance.
A project branch is simply a copy of the original project. Once the branch is made, you can edit the branched templates or library code and it will be changed independently from the original branch.
The new branch will not be used when running templates unless it has been configured for use. There are two ways that we can configure it for use.
1. Associate the branch with a publish state on the Site Root properties screen. To see this screen, highlight your site root and then select Site Root from the properties accordion. There you will see a list of publishing states each adjacent to a drop-down list of branches. You can there select a branch to use for a given publishing state. There will also be an entry labeled “All Other States” for a default branch that is used in all other cases.
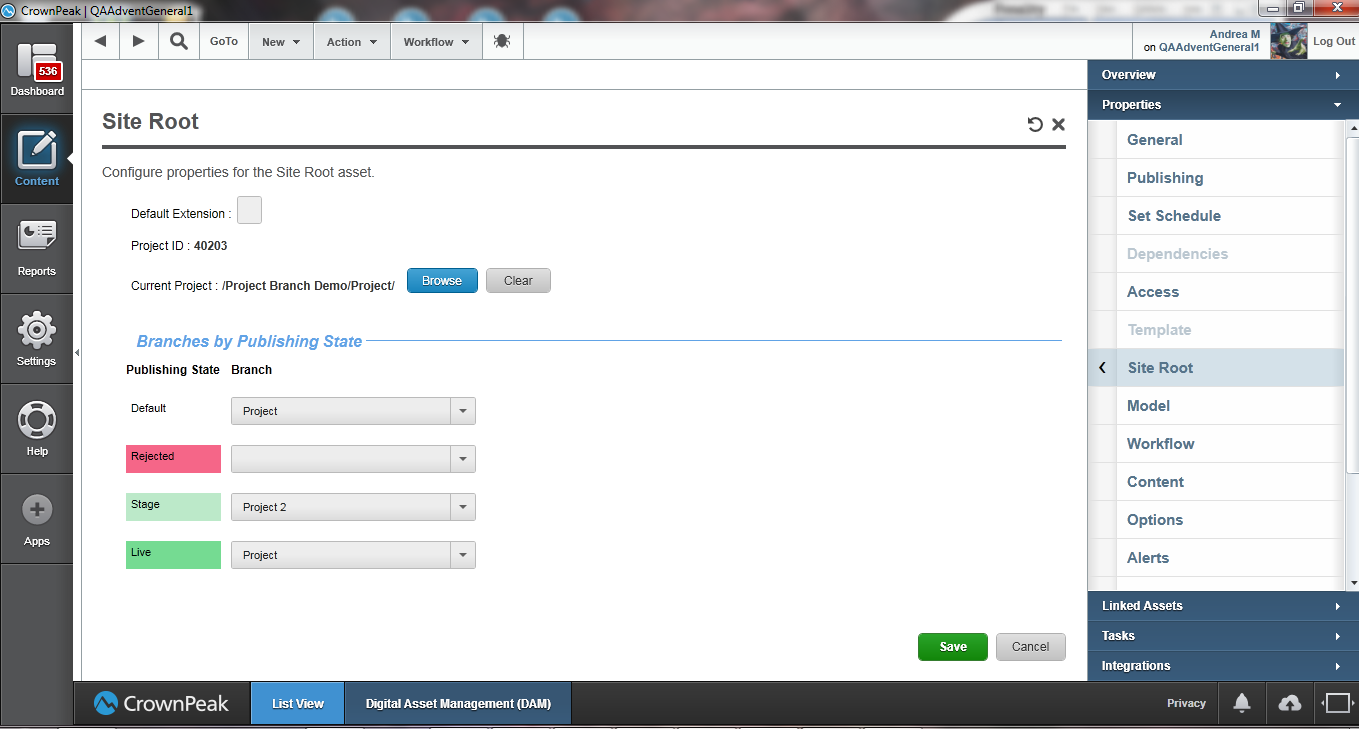 Figure 2 - Site Root Properties
2. In the UI, you may also select a branch from the drop-down to run during preview or edit. If you have a branched selected on save, then it will be used for post_save or post_input templates as well. The figures below show the difference between the asset Preview based on the branch selection. Figure 3 shows the Original Project, the jellybeans represent the Default as set at the Site Root level and Workflow state. Figure 4 displays the preview based on the new template in Project 2. This time there is only one jellybean representing the Workflow.
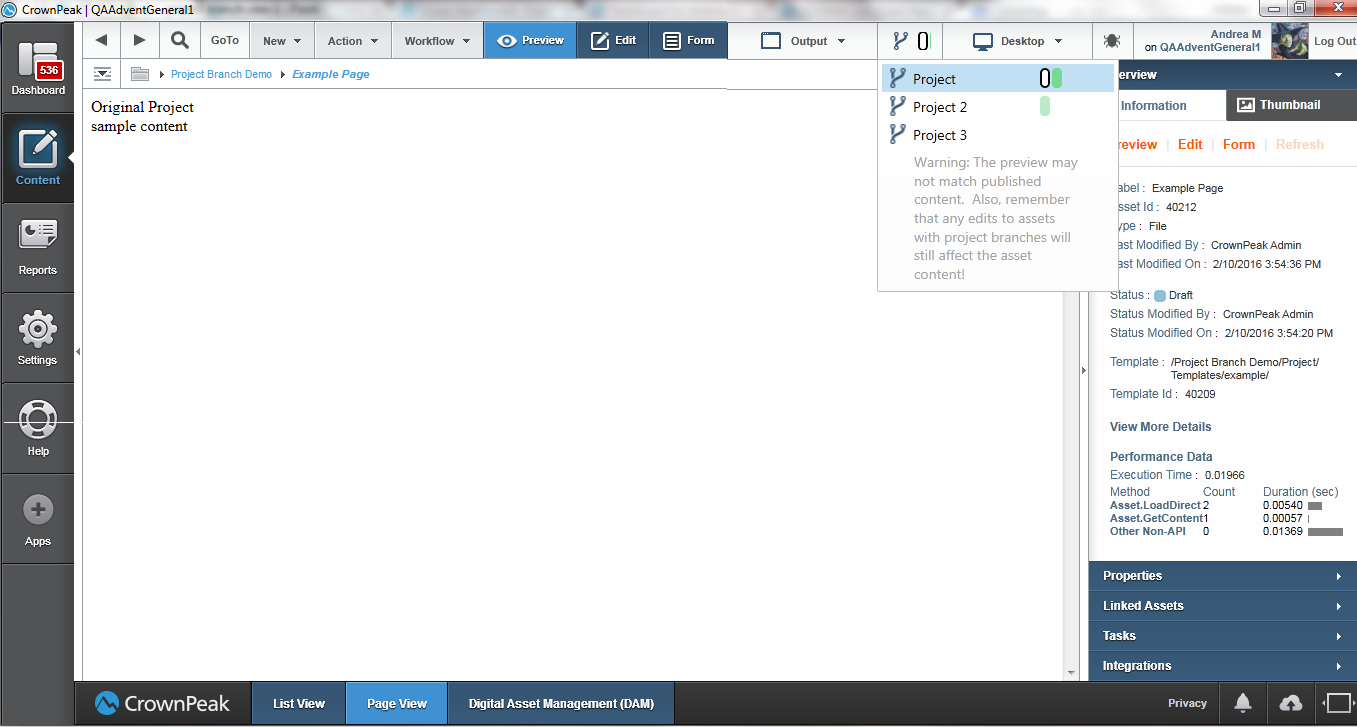 Figure 3 - UI Branch Selection
 Figure 4 - UI Branch Selection
Project Source Compare
Another powerful aspect of the Project Branching feature is the ability to perform a source compare between the Project branches. By performing the compare, you can see the differences between the two branhces.
To perform a branch compare, use the following steps:
1. Select the branched asset you wish to compare in your Project
2. Select [Branches] from the Properties menu (Figure 5)
3. In the list, select the branches you wish to compare
4. Right click and select [Source Compare]. The comparison window will open and you can review the changes between the branches (Figure 6)
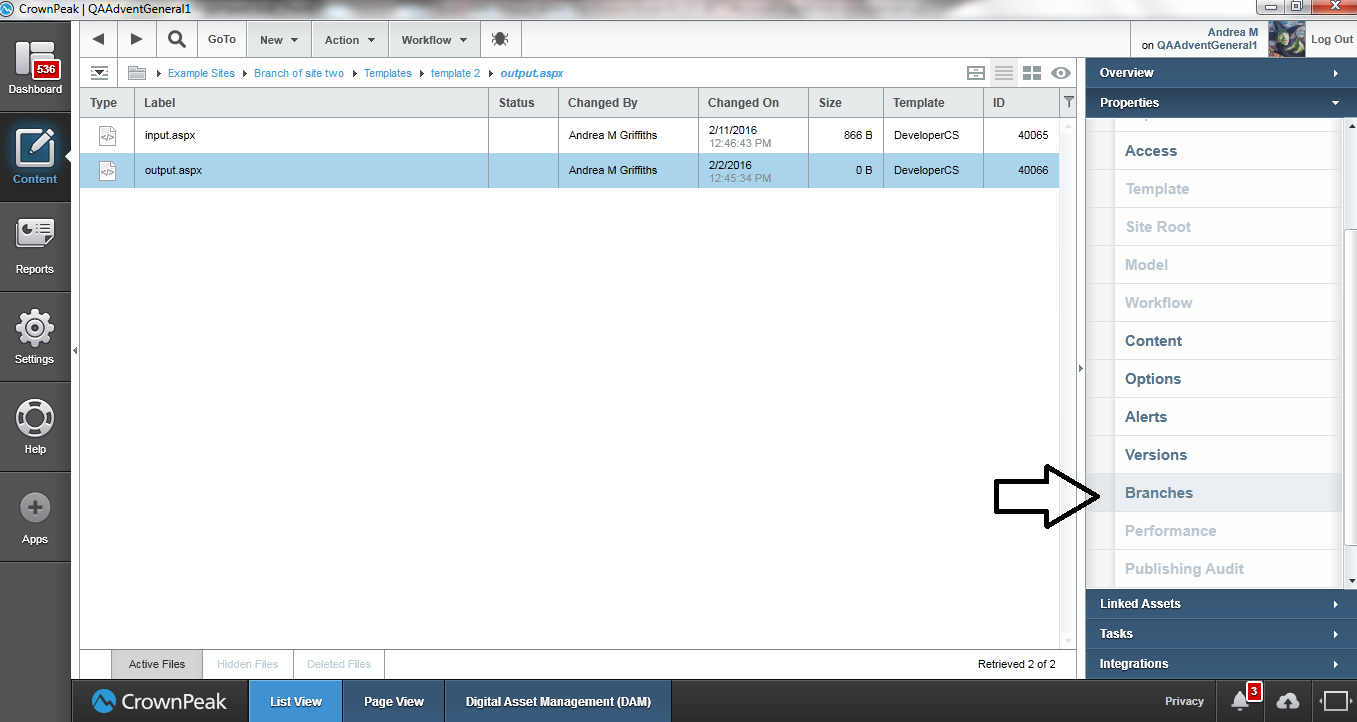 Figure 5 - Branch Properties
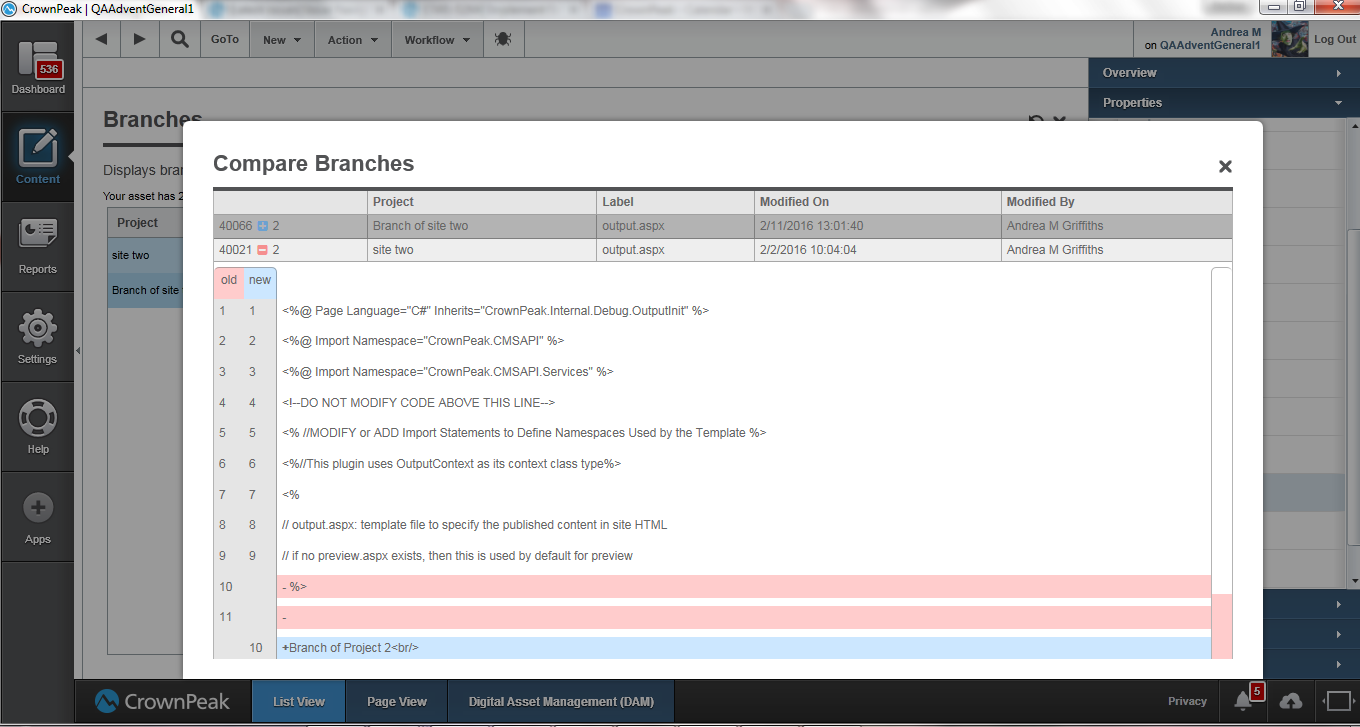 Figure 6 - Branch Compare
How to Safely Update a Template for a Live asset
Assumption: The template is in a Project and published content is part of a Site root that has the project selected as its current project.
You have a live site and one of the templates used to render the pages needs a change. It may be fairly involved or a simple change, the bottom-line, however is that you do not want it used to render a live page until you are ready. At this time, assume you have only one project and it has never been branched.
1. Select the Project and then select [Action] -> [Branch]
2. Enter a name in the dialog box which appears with a suggested branch name. You can rename it later in the same manner as other assets are renamed.
3. Make desired edits in the branch (e.g.) edit Templates or Libraries. The branch is not currently in use so you can safely change it. You should be able to use any CrownPeak supported code editing environment.
4. Go to the site root folder and select the [Site Root] from the properties accordion on the right.
5. On the configuration screen you can associate branches with configuration states. You could associate your original branch with Live and your new branch with a non production site like Development or Stage. These settings will be used to select a branch at publish time.
If you do not want to associate the new branch with a publishing state at this time, you can select it to be used during Preview, Editing, or View Output.
6. Select the asset against which you wish to run the code in the branch.
7. After selecting Preview, Edit or View Output you will see a drop-down list of all available branches. If you select one that is different from the current one it will reload the page using the new branch.
8. The selection is used only within Volte, by the same user, for the current session. If the user reaches a screen with a different set of branches, the choice is reset.
9. If no selection has been made, then the branch associated with the asset’s state in the Site Root configuration screen is used by default. If there is no match, the oldest branch is used.