In this blog, you will see how you can easily create a small application to add an asset to your Crownpeak DXM instance.
Before you start, there are some precursory steps you need to take that are individual to your account, these are outlined in Steps 1 and 2.
Step1
Contact support@crownpeak.com and request a developer public token for your instance. You will need this to access the Content Management System's Access API.
Step 2
Take a note of the following information, which you will need to perform the actions through the Access API.
- Your instance name i.e. https://cms.crownpeak.net/yourinstancename/v3.
- Your public key (see step 1).
- Your username that you will use to log in with.
- Your password that is linked to the login username.
- The folder ID where you will create the asset.
Step 3
Download the Access API Helper classes. Unzip the compressed solution and save for later.
Step 4
In Visual Studio, open the AccessApiHelper.sln found in the package from Step 3.
You should see the following
Step 5
Step 6
Step 7
- 'instance' is your own instance of Crownpeak DXM i.e. https://cms.crownpeak.net/yourinstance/
- 'publicKey' is your Access PI token obtained from Crownpeak Support.
- 'username' and 'password' are an account that has the necessary permissions to perform the actions you intend on running through the Access API (in this example, create an asset).
Step 8
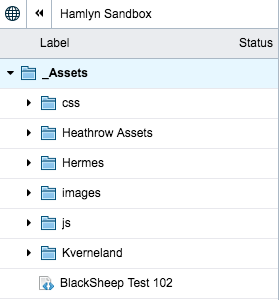
using CrownPeak.AccessApiHelper;using CrownPeak.AccessApiHelper.ApiAccessor;using System.Configuration;using CrownPeak.AccessAPI;Now add the variables of your settings from your App.config:class Program { //Variables for connecting to your CMS private static CmsApi _cms; private readonly static string Server = ConfigurationManager.AppSettings["server"]; private readonly static string Instance = ConfigurationManager.AppSettings["instance"]; private readonly static string PublicKey = ConfigurationManager.AppSettings["publicKey"]; private readonly static string Username = ConfigurationManager.AppSettings["username"]; private readonly static string Password = ConfigurationManager.AppSettings["password"];Now add the code to create a new Asset in Crownpeak DXM inside the Main method of your Program.cs.//Sign in to the CMS _cms = new CmsApi(new SimpleApiAccessor()); _cms.Init(Server, Instance, PublicKey); //Now login var result = _cms.Login(Username, Password); Console.WriteLine("User logged in!"); // _Asset Folder in CPUK var folderId = 69912; // Create a new Developer Asset var assetName = "BlackSheep Test 102"; WorklistAsset asset; if (result) { try { _cms.Asset.Create(assetName, folderId, 0, 2, 0, 0, 0, out asset); Console.WriteLine("Asset with name: " + assetName + " created! Press ESC to exit"); //Pause to let user ready console Console.ReadKey(); } catch (Exception e) { Console.WriteLine("No asset created! You seem to have an error: " + e); //Pause to let user ready console Console.ReadKey(); } }


